Invite advocates to become members
Begin to build a campaign by inviting your best advocates—members of that community of consumers who love your brand—to join your sampling program. After a consumer decides to participate and registers, you can add the member to your sampling campaign.
Be aware that the following email templates are used when an advocate is invited to become a member:
- Registration invite email (this template is modified in the procedure below)
- Registration confirmation email
- Registration reminder email
Before beginning
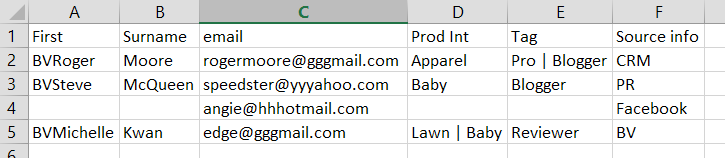
Obtain or create a comma-separated value (CSV) file that contains the email addresses of community members you want to invite. You must include an email address for each member. You can also include any of the following data types in the file. The order and data field title (column header) do not matter; you will map them later.
- Email address (required)
- First name
- Last name (surname)
- Nickname
- Gender (male or female)
- Member ID (examples: BV reviewer ID, CRM ID)
- User-selected interests (examples: apparel, baby, electronics, gardening)
- Admin-selected interests (examples: consumables, hard goods)
- Tags (examples: employee, blogger, reviewer, professional, tier 1 customer)
- Source (examples: BV reviewer, Facebook, CRM)
| To include multiple values in a data field (column), separate the entries with a | (pipe); see the values in the Tag column in row 2 in this example: |
Inviting members
-
Upload the CSV file:
- Log in to the Sampling portal using your admin credentials.
-
Click Members at the top of the portal and then click Invite Members. Or, click Invite Members on the View Members page. The Step 1: Upload CSV page is displayed.
-
Click Choose File to select the CSV file.
- Click Upload File to import the file.
Note: If your file includes email addresses of members that have already been invited, an option will prompt you to ignore them or re-invite them. - Map each data field in the CSV file to a field in the Bazaarvoice database:
-
On the Step 2: Map Data Fields page, select an option from the drop-down list under CSV Columns that matches the database field name (under DB Fields). For example, for the Firstname DB field, select First from the drop-down list.
After you make selections, preview data is displayed above the fields so that you can see how your data is mapped.
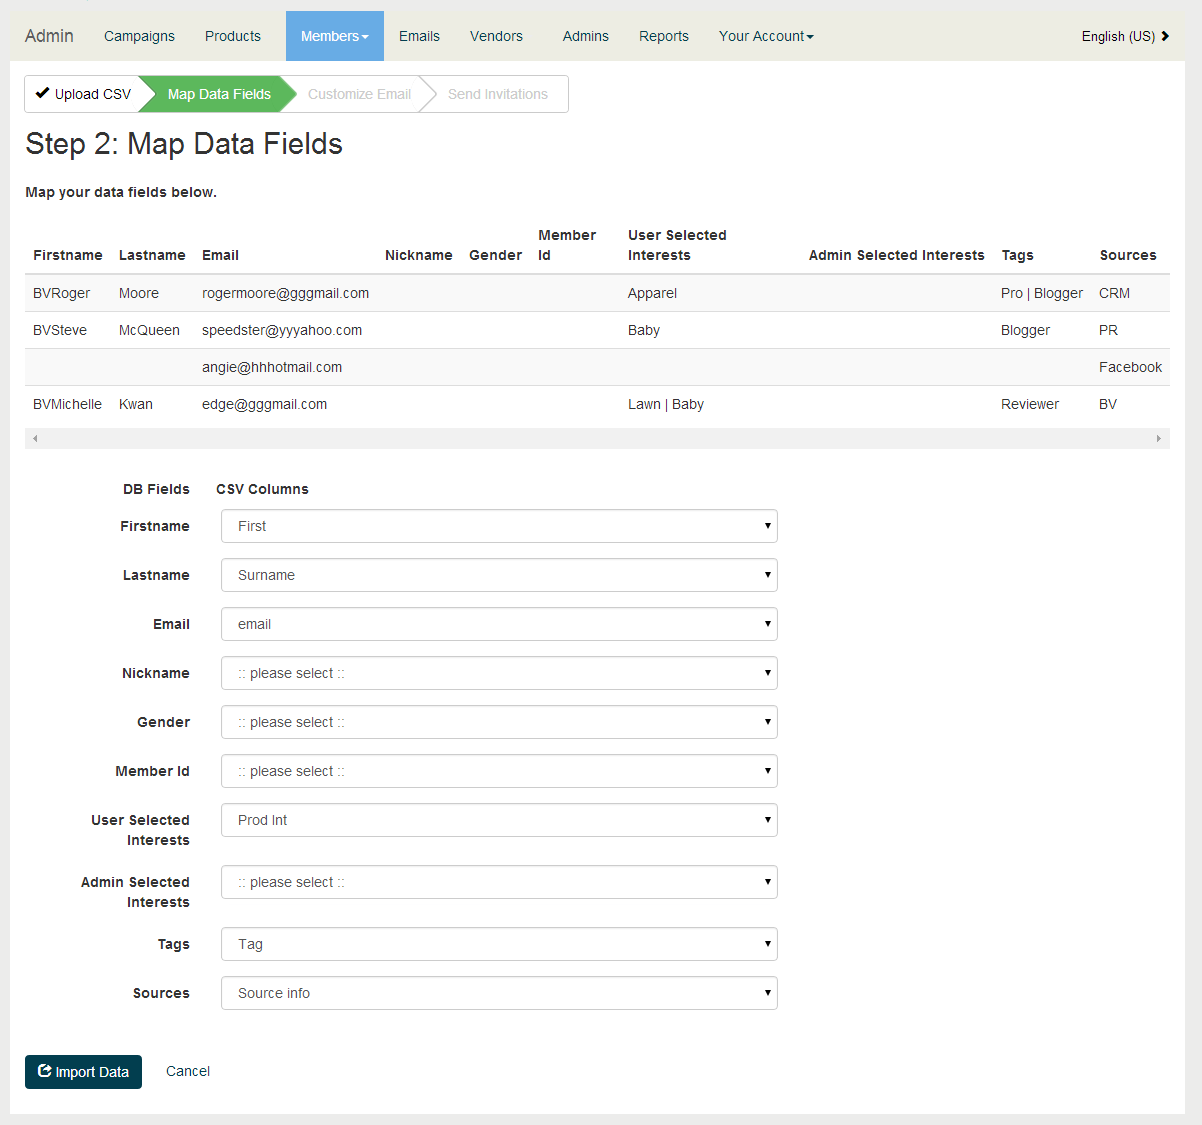
- Repeat step a for each database field.
- When finished, click Import Data.
-
- Customize the email message that will be sent to community members. This step is optional, though you might want to use certain language, for example, if you are inviting a group of bloggers.
Note: The content of this email message comes from the "Registration invite email" template, which is available on the Email Templates page.
- On the Step 3: Customize Email page, configure the following:
- Subject – Include a clear and compelling call-to-action so that recipients understand what you are asking them to do. Use 9-14 words, if possible, and be cognizant of spam filter triggers, such as special characters, all capital letters, and so on. This field allows up to 50 characters. Example: Join to try Brand products for free.
- Header (title) – Provide a clear and concise title to the email message. You can specify up to 50 characters.
- Body – Include a single call-to-action to limiting distracts of other marketing messages. Provide clear and concise messaging so that members can quickly identify the action you want them take. You can specify up to 200 words.
- Banner image – Upload or reference a JPEG file that is 600x200px. You must have the license to use any images, graphics, and logos you provide.
- When you are have finished, click Next.
- On the Step 3: Customize Email page, configure the following:
- Review and send your invitation to members:
- On the Step 4: Send Invitations page, send a test email of the invitation by entering one or more email addresses in the Send test email to: field, and then clicking Send. To specify multiple addresses, separate each address with a comma.
- To invite the new members to join a campaign that is in-progress, select one or more of the campaigns listed on the page. After the members register and complete their profiles, they can select sample products to receive.
- Click Send Invite Emails to send the invitations.
After you invite members to your community, wait a few days for them to accept your invitation and register their profiles. If you like, you can send them a member registration reminder.